Pages

Thursday, September 15, 2011

Everthing's Better With Bacon....Green Beans with Bacon, Tomato and Garlic

       Lisa's Dinnertime Dish has moved.  Please visit me at my new and improved blog site!  The new address is http://lisasdinnertimedish.com.  I look forward to seeing you at the new site!!


      Last night I had to come up with a quick dinner.  I'm sure that sounds familiar to a lot of you, someone always seems to have something going on in the evening, right?  We actually had something very fun that we were doing last night.  Steve, Alex and I were going to the Foo Fighters concert (...yes....I like the Foo fighters....and yes....it was my idea for us to go, but whatever).  The concert was fabulous, but I digress, I'm trying to tell you about my quick dinner.

     My initial plan was definitely something quick, but was definitely a yawner.  I was going to reheat some grilled pork chops that I had in the freezer, defrost some rolls and steam some fresh green beans.  Well, that just wasn't going to do it for me, so I started thinking about how I could ramp up the green beans.  As I thought about it, I remembered that I had some bacon, garlic and a nice roma tomato and I knew I was on to something.

     All I did was saute some chopped bacon (a great tip for bacon is to cut it up and freeze it.  Then when a recipe calls for chopped bacon, just defrost it for a couple of minutes in the microwave and it's ready for your recipe), saute the tomato and garlic, steam the green beans and mix it all together.  It literally took me about 15 minutes to put together.  I actually had to turn the heat off for a few minutes, because we weren't all ready for dinner yet.

     They were very tasty and way better than plain old steamed green beans!  Alex's comment was, "What's wrong with bacon, garlic and green beans?"  I think, nothing!

      So here it is:

   Green Beans with Bacon, Tomato and Garlic

  • 2 strips of bacon, chopped
  • 1 large clove garlic, finely chopped
  • 1 large tomato (I used roma), seeded and chopped
  • 1 lb fresh green beans, trimmed and washed (I bought my pre-trimmed and washed)
  • salt and pepper to taste


Heat a large skillet over medium heat.  Add bacon and saute until crisp, remove from pan and set aside.  Meanwhile, microwave the beans for about 3 minutes.


Add garlic and tomato to the pan and saute until garlic is fragrant and the tomato starts to break down and form a sauce (you want it to coat the beans).


Add the bean to the pan and toss to coat with the tomato.  Season with salt and pepper.


Place in a serving dish and top with the bacon.  Enjoy!


Shared at It's a Keeper on 10/6/11

Tuesday, September 13, 2011

Fall is in the Air, Soup is on the Stove

       Lisa's Dinnertime Dish has moved.  Please visit me at my new and improved blog site!  The new address is http://lisasdinnertimedish.com.  I look forward to seeing you at the new site!!


      Today was definitely not as warm as the last few days have been.  When the weather starts to turn cooler, it definitely puts me in the mood for soups and stews.  They just make you feel warm and cozy.  Since I had just filled my freezer with homemade chicken stock, I decided that chicken noodle soup would be on the menu tonight.

     Soup is actually a very easy thing to make, my chicken noodle soup only has about six main ingredients.  You could make it even more simple by buying carrots, celery and onion that are already chopped.  I used raw chicken, but if you had cooked chicken on hand (like a rotisserie chicken), you could definitely use that instead.  Since I had a lot of ingredients on hand, I made a triple batch so that I would have lots of leftovers to freeze for later.
   
     This recipe is a family favorite, I usually serve it with a salad and some warm bread.  Simple and delicious!  I shared this recipe in an earlier post, but I thought I would share it again, along with some photos, so you can see how delicious it looks.


Chicken Noodle Soup
This recipe will serve about 4 to 5 people


     2 tsp olive oil
     1 lb boneless skinless chicken breast
     2 medium or large carrots,  peeled and chopped
     2 large stalks of celery, chopped
     ½ medium onion, chopped
     1 tsp poultry seasoning
     1 tsp salt
     ½ tsp pepper
     6 cups chicken stock
     1 cup multi-grain pasta, such as Barilla Plus


Heat olive oil in 5 quart dutch oven over medium heat.  Add carrots, celery, onion and poulty seasoning and sauté for about 5-7 minutes until the onions are translucent.  Add chicken stock and increase heat to high and bring to a boil.  While waiting for soup to boil, cut chicken into one inch pieces.  Once soup comes to a boil, turn heat down to medium high and add the chicken and let it poach for about 5 minutes.  Then add pasta and let it cook for 8-10 minutes.  Remove from heat immediately or the pasta will continue to cook and will soak up the liquid and become over-done.  If you are not going to serve the soup immediately, you can let the soup simmer over low heat without the pasta.  10 minutes before you’re ready to eat, increase heat to medium high and add pasta and cook as directed above.


Sounds pretty simple, doesn't it?  Looks pretty tasty, doesn't it?  Give it a try and see if your family likes it as much as mine does.


Monday, September 12, 2011

The Easiest Grilled Shrimp....Ever

        Lisa's Dinnertime Dish has moved.  Please visit me at my new and improved blog site!  The new address is http://lisasdinnertimedish.com.  I look forward to seeing you at the new site!!


     Happy Monday to everyone! I always love early September. The mornings and evenings are cooler, but the day still heats up to feel like summer (which I love).  This past Friday was one of those great September days, so Steve sent me a note on his way home from a business trip and suggested that we take advantage of the weather and spend the evening grilling and enjoying our deck.  I thought he had a great idea.....I'd been thinking the same thing.

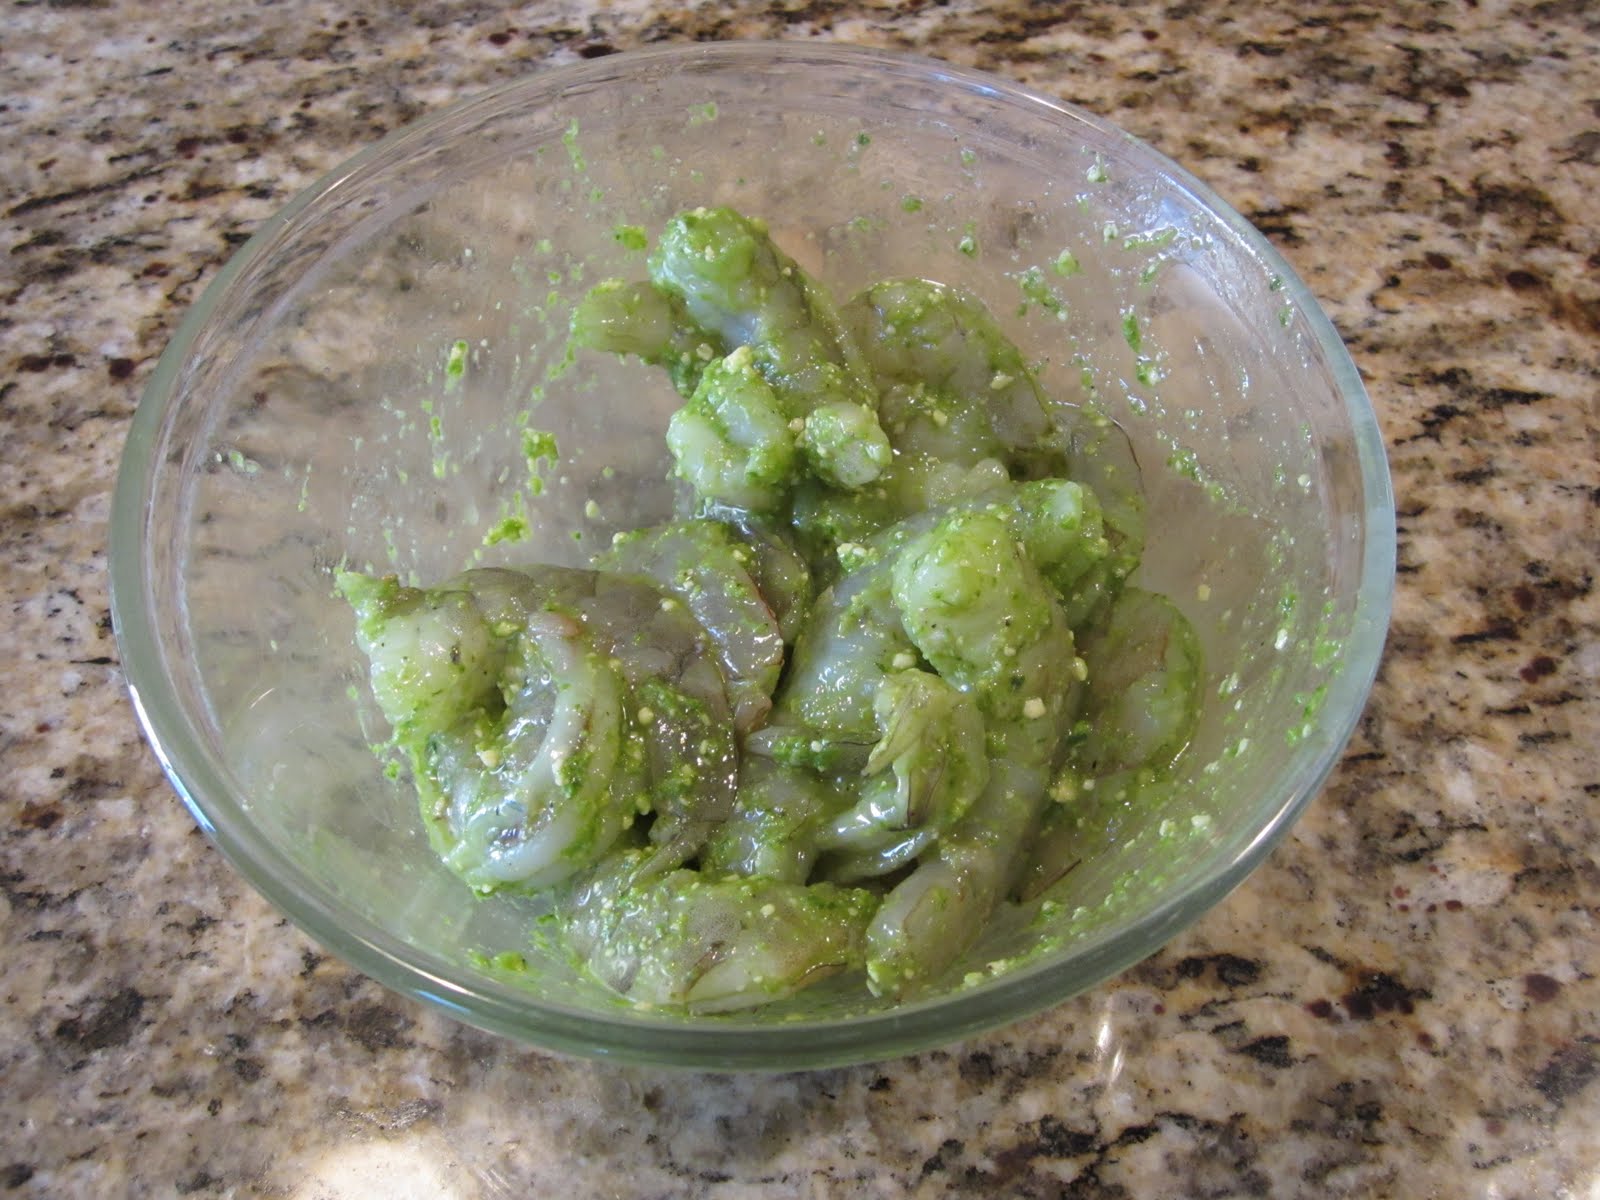
     I had been at Sam's Club earlier in the day and they happened to have some great looking shrimp at a pretty good price, so I picked some up, along with some pesto.  I thought, how about I toss the shrimp with some pesto, skewer them and throw them on the grill?  Then I saw they had some already cut vegetables ready for the grill and I thought, why not toss them with some pesto, too, before they go on the grill?  How easy does that sound?
     Well, it was VERY easy and the meal was delicious.  I will definitely be making pesto shrimp skewers again!

     Here is exactly how I did it:

Pesto Shrimp Skewers


1 lb large shrimp, peeled and deveined
1 jar prepared pesto
skewers


I know, it's a lot of ingredients

Place the shrimp in a bowl and add the pesto, a spoonful at a time until the shrimp is well coated.


Thread the shrimp onto the skewers.


Grill over medium high heat for 1 to 2 minutes per side, until shrimp is opaque.

That's it!  I removed the shrimp from the skewers because mine are metal, so they were very hot.  But if you use wooden skewers, you could just serve everyone their own skewer on their plate.

Give this one a try, you won't be disapointed!


Friday, September 9, 2011

Grandma's Buns

         Lisa's Dinnertime Dish has moved.  Please visit me at my new and improved blog site!  The new address is http://lisasdinnertimedish.com.  I look forward to seeing you at the new site!!


      My grandma was a really great cook.  I think that left a big impression on me when I was young and gave me inspiration to cook.  My grandma was one of those people who made cooking and baking look effortless. I'm not sure how she did it, but she seemed to have a never ending supply of baked goods in her freezer.  If company stopped over (which seemed to happen a lot at my grandparents house), she would put a pot of coffee on and pull something delicious out of the freezer.

     Grandma also seemed to have an endless stream of family and friends coming over for dinner and everyone was always fed very well.  Her pot roast was awesome!  To this day I'm not quite sure what she did to make it so delicious, but I think it was one of my favorite meals that she made. When Grandma entertained, she always set a beautiful table.  She bought china like some women buy shoes, I think she had at least four sets of china.  I feel very fortunate to have inherited her first set of china.  It is a set of  Noritake that she got sometime in the 1940s and they are beautiful!  I proudly display them in my dining room.

Grandma's beautiful china

     The thing Grandma was probably most famous for making was her incredible dinner rolls. We affectionately referred to them as “Grandma’s buns”.  She always seemed to have some on hand.  She even made them for my wedding reception.  This is one recipe she passed on to us before she passed away.  My  sister-in-law, Kay, now makes them every year for our family's Thanksgiving and Christmas dinners....there are never many left for her to take home.

     As I do not consider myself  to be much of a baker, I have never tried baking Grandma's Buns myself.  But I got up today and thought, what the heck, let's see if I can make them. The jury is still out, I just put them in the oven so I have about 10 minutes more to go.  I do have to say, though, they look pretty good.  But the true test is in the tasting!


 Grandma's Buns
  • 1/2 cup warm water
  • 1 tsp sugar
  • 5 tsp yeast (2 packages)
  • 1 1/2 cups warm water
  • 1/2 cup sugar
  • 1/2 cup oil
  • 2 tsp salt
  • 2 eggs
  • 6 cups flour, plus 1/2 cup


Mix 1/2 cup water, 1 tsp sugar and yeast together in a glass measuring cup and set aside to rise.


Mix remaining water, sugar, oil, salt and eggs together.


Add 3 cups of flour and mix with a mixer until smooth.


Add yeast when raised to top of cup. ( the yeast get really bubbly and expands while it sits)


Add  1 more cup of flour still using mixer.


Add last 2 cups of flour and mix with a spoon or the dough hook of your mixer, do not over mix.


Put 1/2 cup of flour on a board and put dough on it.


Knead the dough until flour is worked in.  If it's still really sticky, add a little more flour at a time until it's just slightly sticky.


Drizzle some oil in a bowl, then add the dough and coat with the oil


Cover dough with a paper towel and let rise until it doubles, (about 1 hour).  To rise, heat oven to 200 degrees and turn off, then put dough in.


Once dough is risen, turn out, back onto a lightly floured board and punch down (flatten and fold over).


Then form into 36 rolls and put on cookie sheets lightly sprayed with cooking spray.  I found the best way to divide the dough up so as to get uniformly sized rolls, was to divide it in to thirds and then divide each third in half and then each half in to sixths.


Then form each piece into a little balls, trying to keep the bottom fairly flat.


Let rise again for about 1 hour.
Bake at 350 degrees for 18 minutes, or until lightly browned. (Check the rolls at 10 minutes, that's what the original recipe said, but mine took 18 minutes)


Well.....I have to say, I think they turned out.  In fact, I think I just pulled a muscle from patting myself on the back!  I wasted no time in trying one and I think they are pretty close to Grandma's.  It  had a nice crust on the outside and the inside was nice and tender.


Even if you don't think you can bake, you should give these a try.  Like I said, I am not much of a baker, and I didn't think that they were that hard.  I was actually a little surprised at how easily they came together. I did not have high expections for these turning out, but just look at the picture.  Aren't they beautiful?!

ENJOY!


Shared at Amee's Savory Dish on 11/4/11

Wednesday, September 7, 2011

Great Make Ahead Beef Au Jus

    Lisa's Dinnertime Dish has moved.  Please visit me at my new and improved blog site!  The new address is http://lisasdinnertimedish.com.  I look forward to seeing you at the new site!!


      This weekend, while we were up at the cabin, we had another great make ahead main dish for dinner on Saturday night.  My mother-in-law, Aneita, offered to bring dinner for that night and she brought her delicious Beef Au Jus.  This recipe is truly simple, you put a beef roast in your crockpot, sprinkle it with a packet of Lipton Onion soup mix, add about a cup of water and let it cook for about 8 hours on low until it's ready to fall apart.  Then you shred it up and pour the juices over it.  When you're ready to use it, just reheat it in the oven.  How simple is that?  You can feed a crowd with very little effort!

     You could experiment with this basic method and try adding some different flavors.  Try adding some beef stock instead of water, or add some red wine to the mix. You could also experiment with some different seasonings, like fresh herbs.  Just be careful about adding anything salty.  The soup mix has plenty of salt in it, and you don't want it to get too salty.


Beef Au Jus

Tender, moist and tasty!
  • 3 lbs chuck roast
  • 1 packet Lipton onion soup mix
  • 1 cup water
Place roast in the bottom of a crock pot.  Sprinkle onion soup mix over the top of the roast.  Pour one cup of water over the roast.  Cook on low for about 8 hours, until very tender.

Remove roast from crock pot, reserving liquid.  With two forks, shred the roast.  If serving right away, put meat in a serving dish and pour  juices over the top.  If serving later, place meat in a storage container or zip-loc bag and add juices.  Freeze or refriderate until ready to use.  When ready to use, place in a baking dish and cover with foil.  Bake at 350 degrees until warmed through.

We served the meat on whole grain buns.

Try it yourself and see how easy and delicious it is! 

ENJOY!


Shared at Gooseberry Patch on 12/21/11.

Pasta Salad: A Great Way to Use Up Leftover Grilled Vegetables

       Lisa's Dinnertime Dish has moved.  Please visit me at my new and improved blog site!  The new address is http://lisasdinnertimedish.com.  I look forward to seeing you at the new site!!


      So, as you may know, I had a bunch of leftover grilled vegetables in my refridgerator.  I wasn't exactly sure what I was going to do with them, but I was confident I could come up with something.  As I was trying to come up with a menu for Friday night at the cabin, it suddenly struck me....yes....Grilled Vegetable Pasta Salad!  How good does that sound?

     As I was packing up the food before we headed up north, I still wasn't exactly sure what I was going to put in this pasta salad, so I threw a bunch of possiblilities into the cooler.  Pasta of course, cheese, fresh parsley, oil, vinegar, tomatoes...oh and don't forget the grilled veggies.

     So, first of all, I decided that I would dress it with a balsamic vinaigrette and I would add some fresh garlic to the dressing.  Then I thought that some parsley would brighten up the flavors (really any fresh herb would have been good, but that's what I had), grape tomatoes would add some more freshness to the salad, and parmesan cheese, well.....isn't everthing better with cheese?!

     You could definitely expand this recipe and add some chicken to make it a main dish salad.  Or you could toss the veggies with marinara sauce and turn it into a hot pasta dish.  I think either would be delicious

     Overall my menu on Friday night was pretty simple:
  • Grilled hamburgers, with lettuce, tomato and various condiments
  • Corn on the cob
  • Grilled vegetable pasta salad
  • Kettle chips
     It was a lovely evening, so we were able to enjoy our dinner out on the deck.


Grilled Vegetable Pasta Salad


  • 1 lb pasta (I used Barilla Plus Multigrain), cooked according to package instructions and cooled
  • About 1/2 cup balsamic vinaigrette (find the recipe on my "A Light Summer Supper Post", but double the quantities and add a clove of minced garlic).
  • About 3 cups grilled vegetables, (any assortment you like) chopped into bite size pieces
  • 1/2 pint grape tomatoes, halved
  • 1/2 cup shredded parmesan cheese
  • Handful of fresh Italian parsley, finely chopped
  • Salt and pepper, to taste


Place pasta, grilled veggies and tomatoes in a large serving bowl.


Toss together and then add vinaigrette, a little at a time, until ingredients are nicely coated, but not overly dressed.  Then mix in cheese, parsley and salt and pepper.

There you go, pretty easy and it was a hit with my family.  Try it yourself and see if it's a hit with your family!

Tuesday, September 6, 2011

A Delicious Start to a Great Holiday Weekend!

       Lisa's Dinnertime Dish has moved.  Please visit me at my new and improved blog site!  The new address is http://lisasdinnertimedish.com.  I look forward to seeing you at the new site!!


      We had a great Labor Day weekend!  Steve, Alex and I left on Thursday and went up to our cabin.  Once we were up there, we had family members and friends coming and going all weekend, so lots of activity, which is always fun.  The weather was not the best, but we had great company and shared some good food!

     On Thursday night, it was just Steve, Alex and me, so we decided to go have dinner at one of our favorite restaurants up north.  It's called Prairie Bay and everything on their menu is delicious.  They make all of their food from scratch and they use local ingredients as much as possible.  On this particular visit, the three of us each had, what was probably, THE BEST meal we have ever had there.

Prairie Bay in Baxter MN

     I decided I was going to try something different.  So I ordered what they call "Baxter Bouillabaise", which I'd never had before.  It is a seafood stew with mussels, shrimp and big chunks of walleye, which is cooked in a saffron orange tomato sauce that was absolutely heavenly!  The sauce had onion, red pepper and chunks of tomato, it was incredibly rich and flavorful.  The dish came with perfectly grilled ciabatta bread to dip in that wonderful sauce.  I ate every last bite!!

     Steve decided he was going to go for the Bacon Braised Shortribs with Grilled Sweet Potatoes.  This was bit of a departure for him since he is not normally a fan of sweet potatoes.  But they were cut in rounds, grilled and then topped with bacon and onions and he had to admit that he actually liked them.  He knew the shortribs would be good.  They take boneless shortribs and slow cook them until they are almost falling apart.  They are moist and perfectly browned.  Not much left on his plate either.

     Alex's meal involved that fabulous ingredient that I've been touting, except this time it wasn't truffle salt but truffle oil.  He ordered a grassfed beef burger that was topped with bacon, swiss, carmalized onions, portabella and black truffle oil.  This was his first experience with the truffle oil and he thought it was fanatastic!  He devoured the burger (ok, he's 16 so not a big surprise), and couldn't stop talking about how good it was.  Some of the oil dripped onto some of his fries, so it was bonus truffle fries, another incredible combination.

     After the meal was over we took a few moments to bask in the deliciousness of it all!

Alex in truffle oil bliss!
     Coming up this week:  Find out what I ended up doing with all of those leftover grilled vegetables I had in my refridgerator.  Also find out how to make my mother-in-laws beef au jus, it's quite delicious!